Saturday 28 April 2012

All I ask is a tall ship and a star to steer her by ....

"I must go down to the seas again, to the lonely sea and the sky,
And all I ask is a tall ship and a star to steer her by..."
John Masefield, 'Sea Fever' (1902)

You might not realize it while looking at the stars with your naked eye, but stars are constantly moving across the sky. This is because of the Earth's rotation along its North-South axis, which makes relatively stationary stars in the night sky appear to move slowly in a circular fashion. So it's not so much the stars moving - it's you who's moving!

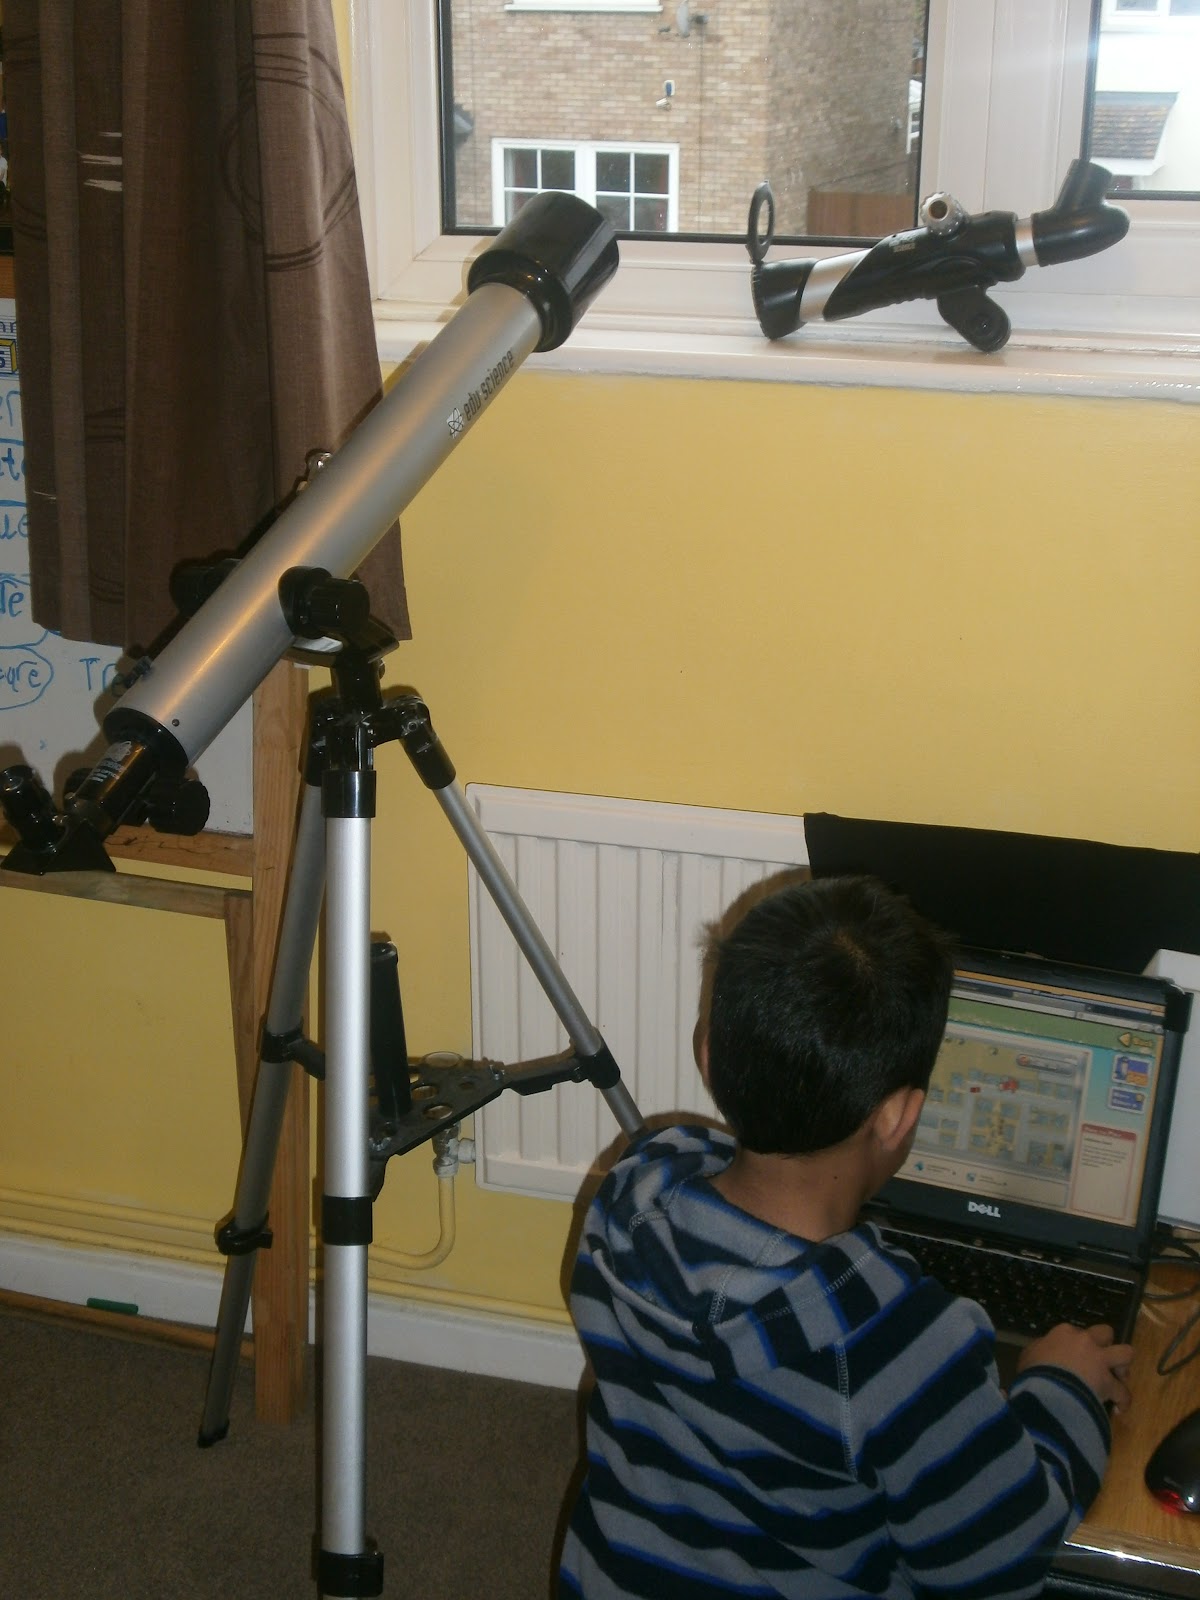
This movement can be clearly seen if you have a magnified look at a star with a fixed telescope or pair of binoculars - the star will appear to travel slowly across your field of view in the eyepiece. A good demonstration of this can be seen in my video below, taken in real time through my telescope, of Procyon, in the constellation Canis Minor. 


Note that Procyon is actually a binary star system, consisting of a bright white main sequence star named Procyon A and a faint white dwarf companion named Procyon B, the very much fainter star which you can just about see to the left of Procyon A in the video above. However, both stars can clearly be seen to be travelling slowly across the sky from left to right in the video above.

There is, however, one star among the thousands that you'll be able to see in the night sky that does NOT seem to move at all. This is Polaris, in the constellation Ursa Minor, and a clue as to why this star does not seem to move at all is in the name. Polaris is a short form of the Latin 'stella polaris', which means "pole star". The star lies nearly in a direct line with the North-South axis of the Earth's rotation and, as a result, appears to stand almost motionless in the sky, as the Earth and all the stars of the Northern sky appear to rotate around it.

And if you don't believe me, below is a video of Polaris, taken on the same night as the video of Procyon above, using the same telescope and video settings and captured in real time as well. You can see that Polaris hardly moves at all.


An even clearer demonstration of this effect are star trails. If you were to point your camera at Polaris and take a large number of long-exposure photographs (varying from 30-second to 10-minute exposures, depending on lighting conditions and your camera's capabilities) and combine them into a single image, the photo below will be the result - the motion of the stars leaving a trail ofcircles across the night sky, with the motionless Polaris at the centre of these concentric circles.


Because of this unique position that Polaris is in, the star used to be crucial in the old days of naval navigation by the stars. The navigator only needs to find Polaris to find which direction is North. And Polaris is easy to find - even on a cloudy, light-polluted sky, as in the picture on the right. Just locate the two stars that form the outer edge of the 'bowl' of the Big Dipper (called the Plough here in England but I prefer to refer to it as the Saucepan!) Draw an imaginary line straight through the two stars of the dipper edge and the first star it hits of about the same brightness would be Polaris.

In addition, because the star is so far away from Earth (434 light-years), the angle from the horizon to Polaris is the same as the latitude. This angle can be measured precisely using a sextant. Once the latitude is known, all that is then required is to find the longitude. Unfortunately, finding longitude is a bit more complicated - it relies on noting the time at which other stars rise, set, or reach a known position in the sky.


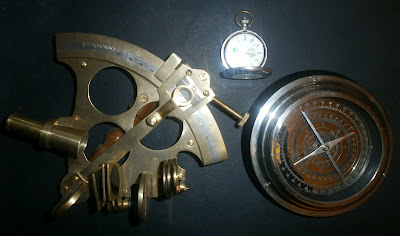
Among my prized possessions in the living room are a brass sextant, naval compass and pocket chronometer (see picture on the left). So, if the Sat Nav, GPS or tom-tom in the car should go on the blink one clear dark night, the only things I'd need would be my trusty sextant and chronometer - and, of course, a star to steer her by!


All photographs on this page  © Sabri Zain 2012.

Sunday 22 April 2012

How to catch a falling star


It is not by accident that my observations over the past few weeks were focussed on the Lyra constellation. I was doing this to familiarise myself with that area of the sky surrounding Lyra, primarily because this weekend is the peak of the Lyrids meteor shower - so called because the meteors would be observed radiating from this constellation.

The source of this meteor shower are particles of dust shed in the cometary tail generated by the periodic Comet C/1861 G1 Thatcher. The Lyrids normally yield an average of ten meteors per hour at its peak, so this is hardly the spectacular light show that you would see from the Perseids in August, the Leonids in November and the Geminids in December - with these you could probably see at least one meteor every minute. However, the Lybrids can produce meteors known as "Lyrid fireballs", which are significantly brighter and more spectacular than the thin streaks left by other meteor showers and may even leave behind smokey debris trails that last minutes.

I managed to capture my first ever fireball on camera last night:


The good news for those of you interested in meteor-hunting is that you don't need a telescope to do it. You just sit back in your lawn chair and look up to the sky with your MK I eyeballs. While meteors appear to radiate from one point in the sky (called the radiant), they can appear anywhere in the sky and at any time point in time - so a telescope would be virtually useless because you would have no idea where to point it.

The bad news is this also means you have no idea where to point the camera at and makes meteors very, very difficult to photograph well. So what I had to was to point the camera at about 45 degrees to one side of the radiant, set it at a wide field of view, have the camera automatically take time lapse photographs of 15-second exposures for two hours and hope for the best. That one photograph above was from over 200 images taken.

What's even more frustrating is that I managed to see at least one other fireball that was even more spectacular - it had much longer fire trail and lit the sky around it with a fiery green glow that lasted a full two seconds at least. Unfortunately, my  camera was pointed in exactly the opposite direction during those two seconds.

Of course, taking time lapse photographs will also unintentionally capture every flying object in the sky, not just meteors. This includes the object below - not a Constitution-class Federation starship or a Klingon Bird or Prey, unfortunately, but a normal commercial passenger plane, judging from the regular patterns made by the red and yellow navigation lights and beacons.


Another challenge in meteor hunting is, of course, the British weather. Considerting this green and pleasant land has such horrid and unpleasant weather, I think it is nothing short of a miracle that this country can produce astronomers the likes of Isaac Newton and Edmond Halley. Last night was absolutely blanketed in cloud, the image below being typical of what conditions were like. Very pretty, of course, but very frustrating astronomically. I essentially only had a small windows of less than half an hour of a decent amount of clear sky to capture any images.


Nevertheless, last night was a good dress rehearsal for the big light show coming up in August - the Perseids. Here are a few tips on how you too can go meteor hunting then:


  • Check for the peak time of the meteor shower.
  • Meteors will tend to cluster around a single point in the sky called the radiant. Aim your camera toward this point, but not directly at it - about 45 degrees to one side will give you the highest chance of catching the most meteors and you'll be able to capture as much of the meteor trail as possible.
  • Use a sturdy tripod and remote shutter trigger or shutter release cable, if available, to eliminate camera shake. You could also use the self-timer. Ideally, you should have a camera or camera control computer software that would allow time lapse photographs to be taken automatically.
  • Use the manual mode on the camera to have full control
  • Set to a wide angle setting - this increases your likelihood of success. The wider your lens, the more sky you'll get in your photo and the higher the chance you'll catch a shooting star. But not too wide though - otherwise your meteor streak will appear too small and quite unimpressive.
  • Use manual focus. Focusing on stars can be difficult in a dim viewfinder, so set the focus by focussing on a bright star such as Vega or Arcturus, or just set it to infinity.
  • Set F stop settings just short of wide open
  • Set cameras for long shutter times but not too long, to avoid star streaking and CCD noise.  Lots of short 5-15 second exposures might do better than, say, a single maximum exposure, since long exposures with digital cameras result in noisy images My shot above was taken using 15-second exposures.
  • Meteors are impossible to predict, and it takes a great deal of luck to capture them on digital film. Don't be discouraged if you take a hundred photos of the empty sky - if you keep trying, eventually you'll catch that one beautiful falling star!
  • Bring a lawn chair and sit back to enjoy the show.

Thursday 19 April 2012

A stellar 'pas de quatre'

We continue our exploration of the Lyra constellation by looking at a very interesting star, Epsilon Lyrae. The constellation Lyra is not hard to find - just look northeast this time of the year and look for the brightest star. That bright star, Vega, is at the top of Lyra. On most nights, Epsilon Lyra would probably appear as a fairly ordinary star near to it (it's just to the left of Vega in the picture below). 


 But on crystal clear nights with no moonlight, your naked eye might well be able to see that  Epsilon Lyrae is actually two stars, very close together. Zoom in near Vega in the picture above and this is what you'll see: 


Train a telescope on that double star and the two components are clearly visible:


It appears to be a binary star system - the northern star is called e1 and the southern one is called e2. They both lie around 162 light years from Earth and orbit each other. However, that is not the end of this star system's surprises. View each of these stars at higher magnifications and you'll see that they both each consist of two stars orbiting each other themselves - making it four stars altogether.   For this reason, Epsilon Lyrae is often called The Double Double.


However, you'd really need a pretty good telescope to 'split' each of these binaries (i.e. to see the four separate star components) because they are very close together. Being able to view the components of each of these binaries is in fact a common benchmark for the resolving power of moderately large telescopes - and my tiny scope unfortunately doesn't quite make the mark if you actually want them through the eyepiece!


Undaunted, with a little bit of image stacking, wavelet adjustments and bumping up the contrast on the video image above, I managed to get the image below, where you can actually see that each of those stars above actually consist of two points of light (especially clear with the pair on the left of the image below):
So we've got two star systems orbiting each other, each of which consists of two stars orbiting each other, and all of them physically connected by gravity and orbiting slowly about their common center of gravity in a cosmic dance. A stellar pas de quatre, in fact.

Wednesday 18 April 2012

Fancy a bit of astronomical scintillation?

Last night, I turned my telescope to the constellation Lyra. It's northeast at this time of the year and you can't miss it because it'll have the brightest star in that part of sky - Vega. In fact, Vega is the second brightest star in the northern celestial hemisphere, after Arcturus. One of the reasons why it's so bright is because it's relatively close to us - only 25 light-years away from Earth. It's also three times the size of our sun and about 58 times more luminous.

If you've ever wondered why stars are always depicted in drawings as having points (five usually), a clear illustration of this can be seen in the video I took of Vega:


And below is a still from one of the frames of the video - sure looks like a star to me!


Stars are suns and hence spherical. Bright spheres viewed from afar should theoretically just look like steady dots or pin pricks of light.  So why do stars twinkle and appear to have points? If you look at a really bright star, you will indeed see what appears to be spikes coming out from it. These are called diffraction spikes and appear because of the way the light enters your eye through what is essentially a small circular hole. Diffraction is the bending of light around the corner or edge of an obstruction, caused by the wave nature of light. 

As for the twinkling, the scientific name for the twinkling of stars  is stellar scintillation (or astronomical scintillation). Stars only twinkle when we observe them from the Earth's surface  - stars would not appear to twinkle if we viewed them from outer space (or from a planet or moon that didn't have an atmosphere). This is because we are viewing them through thick layers of turbulent air in the Earth's atmosphere - as their light travels through the many layers of the atmosphere, the light of the star is bent (refracted) many times and in random directions as it moves through pockets of cold air or hot air. This random refraction results in the star 'winking'.


And did you know that stars closer to the horizon appear to twinkle more than stars that are overhead? This is because the light of stars near the horizon has to travel through more air than the light of stars overhead and so is subjected to more refraction.

Vega was actually the subject of Carl Sagan's science fiction novel Contact (1985), where a message is received on Earth from an extraterrestrial transmitter array orbiting Vega. You might remember the 1997 film of the novel, where the scientist who detected the signal is played by Jodie Foster and she is later transported to Vega via a wormhole. Foster 's character in the film, Ellie Arroway, worked for SETI - Search for Extraterrestrial Intelligence - a real-life scientific institution that conducts research on intelligent extraterrestrial lifeEarly last year, due to lack of funds, the institute had to shut down their Alien Telescope Array, which searches for radio signals from outer space. However, SETI later managed to raise $200,000 to continue the operation of the telescope through the end of the year. The funds were donated by over 2,000 private donors - including Jodie Foster.

The film also has one of the best astronomical movie quotes ever. When the young Ellie asks her father if he thinks there are people on other planets, he replies "I don't know .... But I guess I'd say if it is just us... seems like an awful waste of space."

Wednesday 11 April 2012

Albireo the Beautiful


Why Albireo the Beautiful? Because Albireo, the 'beak' in the Cygnus (Swan) constellation, is probably the most beautiful thing you will ever see in a small telescope like mine. It is barely visible to the naked eye, and it would only appear as a faint white star. But train a telescope on it and you'll be in for a very pleasant surprise. No magnificent clouds of a million colours that you would see in a Hubble picture of a nebula - just two colours: yellow and blue. But they are like the fiery eyes of an odd-eyed cat staring at you from the pitch black darkness of infinite space. Or like a gold nugget and sapphire stone set in dark velvet on some cosmic jeweller's store front. 


You might have guessed by now that I really like this binary star :) Albireo is at last at a decent height over the horizon at this time of the year, so I just had to capture an image of it while the skies were cloudless last night.  Below is a video I took of the binary star (best viewed in full screen mode), followed by a still image produced after image stacking and processing of the video:


This double star consists of the brighter yellow Albireo A and the fainter blue Albireo B. Seen in a small telescope, the two appear quite close to each other (they are about 35 seconds of arc apart) and it is probably this proximity that heightens the contrast in colours and makes it such a delight to behold. The great thing about this double star is that this is one case where small is beautiful. Observing it with a small scope or even binoculars is more rewarding than viewing it with a monster telescope - the colours appear more intense in low magnification optics.


The video and photo I captured above really do not do this double star justice. This is one star you just have got to see with your own eyes to appreciate its true beauty. Trust me, you will be besotted - as I am.

Sunday 8 April 2012

Bad Moon Rising

Cloud-filled skies again these past few nights, so I had a rummage through my archives and found this video capture of the moon's surface which I did last September. In fact, the first time I'd used my newly-purchased CCD imager with my telescope and was just a test. Still, a few interesting lunar features of note to see in the video.


In the first half of the video above, you'll see that the lunar surface has patches of dark 'seas' - these are the lunar maria. They were dubbed maria, Latin for "seas", by early astronomers who mistook them for actual seas but they are actually large, dark plains of basalt rock, formed by volcanic eruptions in the moon's very distant past.  They are less reflective than the rest of the moon's surface (as a result of their iron-rich compositions) and hence appear dark to the naked eye. The 'seas' you see in this video are Mare Humorum (Sea of Moisture) and Mare Nubium (Sea of Clouds)


Midway in the video, you will begin to see the rays of ejecta of an impact crater and the crater Tycho them comes clearly into view. Tycho Crater is about 85 kilometers across. The sharpness and 'freshness' of the crater and the rays of material radiating from it suggest that this is a young crater - there has been little time for it to be degraded by subsequent impacts. Based on analysis of samples of the crater ray recovered during the Apollo 17 mission, the impact is likely to have occured about 108 million years ago.


Towards the end of the video, we approach the "terminator" - the dividing line between the illuminated (day side) and dark (night side) of the Moon. Shadows and detail are most pronounced along the terminator, and you can see the lunar surface here is quite different - no expansive 'seas' or broad plains of ejecta rays but pock-marked with hundreds of small craters.


This second video above takes a closer look along the terminator. The terminator is actually the best place to make lunar observations. The other illuminated surface on the moon, further from this line, appears almost flat, due to the dazzling light and the absence of shadows. However, at the terminator, we can see the shadows reveal the depth of the crater walls, the height of the mountain ranges and bringing other topographical features in sharp relief. Due to the angle at which sunlight strikes this portion of the moon, shadows cast by craters and other geological features are elongated, thereby making such features more apparent to the observer. This phenomenon is similar to the lengthening of shadows on Earth when the sun is low in the sky. For this reason, much lunar observation study centres on the illuminated area near the lunar terminator, and the resulting shadows provide accurate descriptions and measurements of the terrain.


And on the subject of measurements, there is an excellent piece of software that allows you to make those measurements with images you take of the lunar surface. The Lunar Terminator Visualization Tool (LTVT) by Jim Mosher is a free software tool that allows you to make highly accurate measurements on lunar images, including drawing contours using digital elevation model (DEM) data and using those for analysing and interpreting crater shadow patterns. Cool stuff! You can dowload LTVT at http://ltvt.wikispaces.com/LTVT


Saturday 7 April 2012

The Lord of the Rings

The Lord of the Rings itself: Saturn. Taken last night, despite a blazing full moon, freezing conditions and frost clouding up my lenses. I've waited half a year to capture this video on my telescope - Saturn was always below or too low on the horizon. But this was well worth the wait - enjoy!


I processed the video above with the Registax astronomical image stacker to see if I could get a bit more detail and obtained the image below. You can just about make out the dark cloud band in the northern hemisphere, as well as the shadow cast by the planet on the rings. Unfortunately, I was not able to resolve Saturn's rings individually or even show Cassini's division (the gap that divides Saturn's rings into two parts) - probably because I hadn't focussed the telescope sufficiently well on the night. Will try harder next time!


The Astronomer's Apprentice: Getting your child to LOVE science and astronomy


There are perhaps very few gifts that a parent can bestow upon his child that is as precious and as valuable as a life-long love for science. And there is no better and easier way for you to introduce a child to the wonders of science than through astronomy.


You don't really need to get your child his or her own telescope to have your child interested in astronomy. But he or she having one of his or her own would make it all that more fun and exciting. Rishon's own telescope is a small 60mm refractor, with a tiny 0.96-inch eyepiece with a 10mm focal length. This particular scope only cost less than £7 from Oxfam, so you don't have to spend too much on these toys. And they are essentially just toys - they are completely useless for serious astronomy. I had to tell Rishon not to expect to see breathtaking vistas such as the rings of Saturn or the cloud belts of Jupiter - if he wants to see those, he can see them through Daddy's telescope. But he could use his own scope to pick out those planets from the night sky and they do provide some quite nice views of the moon and its 'seas' and craters. More importantly, it also allows him to explore the instrument on his own, learn about its parts and how to use them and prepare for when he is old enough to get his own 'proper' scope.


You'll see on his window sill that he also has a smaller spotting scope. Again, it's just a plastic toy - but it can be used for wider field views of the stars and handy for terrestial viewing as well.


Perhaps the first place to start if you want to inculcate a love for astronomy and science is the child's room. A boy's room is his castle and decorating it with a few carefully-selected astronomy objects will go along way to making your child comfortable with and enjoy what could easily be perceived to be a boring old school subject. Take this solar system model that hangs over his ceiling light, for example. Not only does it give him a reasonably accurate illustration of what solar system objects looks like, but it also glows in the dark when he goes to bed. Now, how cool is that?!


And the solar system model below is even more cool. It's like your own solar system navigation computer. You press a button on the keyboard and the relevant planet will magically light up, with a computerised voice telling you all about the planet in question. Press another button and you can sit for a little test, where the computer will ask you a multiple choice question and you have to press the correct button before proceeding to the next space exploration challenge.


Every parent knows how kids sometimes like to wallpaper their rooms with posters. Now, I have categorically state that these posters of starships are not just a refection of his keen interest in Star Trek acquired by constant exposure from his dad - they do have some valuable educatonal value too! Propulsion systems, navigational arrays, science laboratories and communications beacons are not just found on the starship Enterprise of the 24th Century - you'll also see them on the Internatonal Space Station or the space shuttles of today.


Well, okay, Rishon may be a little too young to appreciate the complexities of anti-matter physics and the search for the elusive Higgs boson 'God Particle'. But the poster does have a great picture of Mr Spock! And his Star Trek-themed pillow and duvet set below is both warm and comfortable ... inspirational, yet quite functonal ;)


Be honest now - how many kids would not like the idea of having a real-life space map on the wall of their room? This is Rishon's planisphere - basically a star chart in the form of two adjustable disks that rotate on a common pivot and can be rotated to display the visible stars in the night sky for any time and date. Aside from getting a kick out of spinning the two disks round and round (which Rishon loves to do), he also inadvertently learns how to recognize stars and constellations in the night sky.


And the little cardboard cut-out diorama here was something Rishon got from the local Mad Science club he attended and shows how the different stars in the saucepan-shaped Big Dipper are actually laid out in 3D space.
Like real-life astronomy, Rishon's little dome gadget below requires absolute darkness. Switch the room light off, make sure not a sliver of light enters the room from outside, switch the gadget on and you will actually see the stars and constellations of the Northern Hemisphere projected on your room celing and walls! The transparent plastic dome has a map of the northern sky embossed on it and a light bulb projects a negative image of the map all around the dark room, rotating it slowly around the polar axis. Daddy uses it too - when the night skies are blanketed in cloud and he can't get out to play with his telescope, this is the next best thing!


And below is an ordinary plasma lamp - just the thing to turn any ordinary five-year old boy's room into the laboratory of a mad scientist! Also a good prop to use when trying to explain to your boy the basic principles of electricity, electromagnetic fields, particle theory, ions, states of matter - oh, and of course what the plasma phase inducers do in the warp engine assembly of a Galaxy-class starship!


Kids love computers and you can use this love of computers to get them to love astronomy too - even if it's just computer games. There's nothing Rishon loves to do more than join Dad when he's zapping Klingons and Borg cubes on Star Trek Online or Freelancer. But we also do take a breather from inter-galactic warfare now and then to have a close look at asteroid belts, black holes and supernovae.


There are also a lot of websites that have online games that teach astronomical and space exploration principles to very young children. The NASA Kids Club website  , for example, has games that lets kids manage fuel payloads for the space shuttle, build space station modules, explore microgravity environments and build the International Space Station from scratch!


Computers aside, there's of course the old-fashioned but just as effective way of making your child learn more about astronomy - books! There are a huge number of books for young children that introduces them to the joys of astronomy. Rishon particularly enjoys those produced by Ladybird (because they're easy to read for a five-year old) and Wiley's Visual book series (because they have loads of colourful pictures!).


The Ladybird book 'The Night Sky' in particular has special meaning for me - this was the very same book that I read when I  was six. Published in 1965, it was a good, simple read and absolutely beautifully illustrated in the old classic Ladybird style. The first thing you see when you open the book is a simple star map with the most exotic names like Andromeda and Pegasus, and a menagerie of dragons, bears, serpents and scorpions lurking in the skies above. Turn the page and you behold Saturn - and you've only just reached the title page. The light of a billion suns, galaxies and nebulae awaited in the rest of the book, all the wonder of astronomy, the beauty of art, the awe of the natural word, in a slim 52 pages. A life-changing book for me and I hope it's the same for Rishon.


And talking about life-changing books, here's another one for me - Antoine de Saint-Exupéry's 'The Little Prince'. A little prince leaves his home planet to see how the rest of the universe is like, exploring six planets before he ends up on Earth. Though ostensibly a children's book, the Little Prince makes several profound and idealistic observations about life and human nature. With phrases like "One sees clearly only with the heart - what is essential is invisible to the eye" and "what makes the desert beautiful is that somewhere it hides a well" - this is no ordinary children's book about exploring stars and planets!


Other than reading, children of course also like drawing and writing (and especially drawing). So get them to write about what they read and what you teach them. I have my own astronomical observer's log book and taking pride of place within it are the inciteful astronomical notes from Rishon below 


I also try to get Rishon involved in my own astronomical activities. As Rishon goes to bed at 7.30 PM, it doesn't really leave a lot of time for him to be out in the back garden observing the night sky with me and even when there is time during the early nights of winter, it can also be too cold for him to be out. Nevertheless, he still enjoys helping me set up my equipment before the night's observing starts. And he gets a real kick the next day looking at any pictures I may have taken - especially since he helped Daddy set it all up.


And you don't even need a telescope to enjoy the night sky with your son. Just sit down with him one dark night and quietly explore the amazing array of lights, colours and lines that are painted on the vast velvet canvas above you. I really can't think of a better father-son bonding exercise than showing your son the naked eye wonders of the night sky.


And if extreme room make-overs, toys, gadgets, games or books don't seem to work, just show him one of these in your telescope eyepiece one night. He'll be hooked for life!.


Oh yes, my final tip for you - start 'em young!


Twin Beacons

March this year was perhaps be the best month to watch the planets for years to come - it was when the two brightest planets in the night sky come together for a stunning conjunction. For the Northern Hemisphere, mid-March 2012 presented the best time to see a Venus-Jupiter conjunction in the evening for years to come. The night sky's two brightest planets – Venus and Jupiter – were near each other in the west as soon as the sun went down, like twin beacons. The next Venus-Jupiter conjunction after this one falls on May 28, 2013 but it won’t be as spectacular then as they are in 2012 because it will be in daylight! This image was taken on March 11th at 10 pm - Jupiter is on the left and Venus on the right. The best night to see the conjunction was actually March 15th - unfortunately, I was in Geneva for a bloody meeting that day :[


This image of Sirius below was taken at the same zoom, aperture and exposure settings as the previous image of Venus and Jupiter. The usually stunning Sirius - the brightest star in the night sky - pales by comparison.


Measuring double stars


Let's have a look at three double stars I have observed and recorded below, see how we can do some real science with them. At the top are Mizar and the dimmer Alcor in Ursa Major. Bottom right is Mizar resolved to a higher magnification with a 2X Barlow lens and split to Mizar A and B. And bottom left is Cor Caroli, split to α² Canum Venaticorum, the fainter α¹ Canum Venaticorum.


Let's start with Mizar and Alcor. The simplest method to measure binary star characteristics is by using what is called the drift method. This method consists of taking a long exposure image or a video recording of a pair, so that its movement across the skies is recorded. The lines produced by the drifting star images (called the drift lines) define the east–west line of travel of the pair in the image.


Once I captured a video of the binary with my CCD imager, I then extracted the first and last frames of the video and saved them as two separate image files. Merging these two images into one single image produces the image below.


Draw a line joining the primary star from the first frame with the primary in the last frame (and repeat with the secondary star). This produces the drift line which defines the east–west line of travel of the pair (in blue above). Draw another line perpendicular to this (in white here( - this would now point to celestial north. Then draw a line joining the primary and secondary star (in red above). You can now measure the position angle (PA) of the binary directly with a protractor. Knowing the pixel resolution of your optics and using simple O-Level coordinate geometry and trigonometry, you can also now calculate the separation (the distance between the two stars, in arc seconds). Simples!


The visual method described earlier will work well for widely-separated pairs like Mizar and Alcor. However, with closely-spaced pairs and pairs where the stars nearly align with the east–west line, the magnification and scales you will be working with may not give you accurate results. In these cases, you may want to use specialised software that will take a video image of a travelling pair and do all the calculations for you at the pixel level. Let's try this with Mizar A and Mizar B below.


One simple (and absolutely free!) software programme you can use is BinStar, by Ed Hitchcock ( see http://www.budgetastronomer.ca/index.php?page=binstar ). Just load your video file into the programme, click on the primary star and then click on the secondary star.


Click on 'GO!' and BinStar will play the video and trace the drift line of the binary pairs as it moves across the sky, while automatically working out the position angle and separation.


An even more sophisticated programme (and free as well) is Reduc by Florent Losse (see http://www.astrosurf.com/hfosaf/Reduc/Tutorial.htm ). Let's now examine Cor Caroli below using Reduc.


You first load in the video file and Reduc will then extract all the frames from the file and save them as individual image files.


Reduc then reduces each frame individually to produce a pretty accurate drift analysis, below.


Position angles and separations are then calculated for each frame - you can save these results and manipulate the data in whatever way you please!